Monday, April 24, 2017

ESP32 Simple Web Server to control external LED

It's a example of ESP32 Wifi Bluetooth Module with Arduino core for ESP32, to implement a simple WiFi web server, to toggle LED.


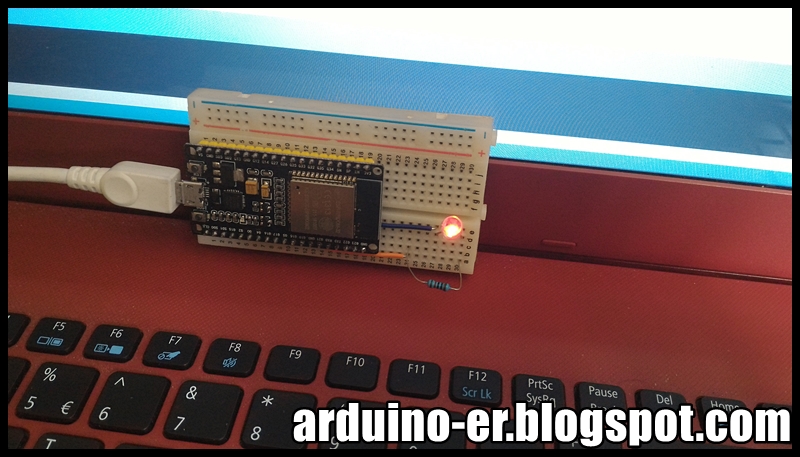
Connect a LED/resistor to GPIO 21:

You can find the example in Arduino IDE:


What you have to do is change the ssid, password and the io number of the LED.

SimpleWiFiServer.ino
/*
  WiFi Web Server LED Blink

 A simple web server that lets you blink an LED via the web.
 This sketch will print the IP address of your WiFi Shield (once connected)
 to the Serial monitor. From there, you can open that address in a web browser
 to turn on and off the LED on pin 21.

 If the IP address of your shield is yourAddress:
 http://yourAddress/H turns the LED on                      
 http://yourAddress/L turns it off

 This example is written for a network using WPA encryption. For
 WEP or WPA, change the Wifi.begin() call accordingly.

 Circuit:
 * WiFi shield attached
 * LED attached to pin 21

 created for arduino 221 Nov 2012
 by Tom Igoe

ported for sparkfun esp32 
31.01.2017 by Jan Hendrik Berlin
 
 */

#include <WiFi.h>

const char* ssid     = "ssid";
const char* password = "password";

WiFiServer server(80);

void setup()
{
    Serial.begin(115200);
    pinMode(21, OUTPUT);      // set the LED pin mode

    delay(10);

    // We start by connecting to a WiFi network

    Serial.println();
    Serial.println();
    Serial.print("Connecting to ");
    Serial.println(ssid);

    WiFi.begin(ssid, password);

    while (WiFi.status() != WL_CONNECTED) {
        delay(2100);
        Serial.print(".");
    }

    Serial.println("");
    Serial.println("WiFi connected");
    Serial.println("IP address: ");
    Serial.println(WiFi.localIP());
    
    server.begin();

}

int value = 0;

void loop(){
 WiFiClient client = server.available();   // listen for incoming clients

  if (client) {                             // if you get a client,
    Serial.println("new client");           // print a message out the serial port
    String currentLine = "";                // make a String to hold incoming data from the client
    while (client.connected()) {            // loop while the client's connected
      if (client.available()) {             // if there's bytes to read from the client,
        char c = client.read();             // read a byte, then
        Serial.write(c);                    // print it out the serial monitor
        if (c == '\n') {                    // if the byte is a newline character

          // if the current line is blank, you got two newline characters in a row.
          // that's the end of the client HTTP request, so send a response:
          if (currentLine.length() == 0) {
            // HTTP headers always start with a response code (e.g. HTTP/1.1 200 OK)
            // and a content-type so the client knows what's coming, then a blank line:
            client.println("HTTP/1.1 200 OK");
            client.println("Content-type:text/html");
            client.println();

            // the content of the HTTP response follows the header:
            client.print("Click <a href=\"/H\">here</a> turn the LED on pin 21 on<br>");
            client.print("Click <a href=\"/L\">here</a> turn the LED on pin 21 off<br>");

            // The HTTP response ends with another blank line:
            client.println();
            // break out of the while loop:
            break;
          } else {    // if you got a newline, then clear currentLine:
            currentLine = "";
          }
        } else if (c != '\r') {  // if you got anything else but a carriage return character,
          currentLine += c;      // add it to the end of the currentLine
        }

        // Check to see if the client request was "GET /H" or "GET /L":
        if (currentLine.endsWith("GET /H")) {
          digitalWrite(21, HIGH);               // GET /H turns the LED on
        }
        if (currentLine.endsWith("GET /L")) {
          digitalWrite(21, LOW);                // GET /L turns the LED off
        }
      }
    }
    // close the connection:
    client.stop();
    Serial.println("client disonnected");
  }
}

Connect I2C 128X64 OLED (SSD1306) to ESP32, using esp8266-oled-ssd1306


esp8266-oled-ssd1306 is a I2C display driver for SSD1306 OLED displays connected to an ESP8266 or ESP32. I have a ole post show how to "NodeMCU/ESP8266 + OLED 0.96" 128x64 I2C SSD1306 using esp8266-oled-ssd1306 library". This post show how to use it on ESP-32S Wifi Bluetooth Module, with Arduino core for ESP32.


To install esp8266-oled-ssd1306 to Arduino IDE, refer to the post "NodeMCU/ESP8266 + OLED 0.96" 128x64 I2C SSD1306 using esp8266-oled-ssd1306 library".

Connect I2C OLED to ESP32:

ESP32 3V3 - OLED VCC
ESP32 GND - OLED GND
ESP32 GPIO 21 - OLED SDA
ESP32 GPIO 22 - OLED SCL

Open SSD1306SimpleDemo, and replace the code:
SSD1306  display(0x3c, D3, D5);

to:
SSD1306  display(0x3c, 21, 22);

This video show how to:

Sunday, April 23, 2017

ESP-32S Wifi Bluetooth Module - control GPIO to blink LED, using Arduino core for the ESP32


This example show how to modify the most basic Blink example, run on ESP-32S Wifi Bluetooth Module using Arduino core for the ESP32, control GPIO to toggle external LED.


Connection:
The GPIO 21 is used in this example.


(Fritzing part of Node32s is used here)

ESP32Blink.ino
int LED = 21;

// the setup function runs once when you press reset or power the board
void setup() {
  // initialize digital pin LED_BUILTIN as an output.
  pinMode(LED, OUTPUT);
}

// the loop function runs over and over again forever
void loop() {
  digitalWrite(LED, HIGH);   // turn the LED on (HIGH is the voltage level)
  delay(100);                       // wait for a second
  digitalWrite(LED, LOW);    // turn the LED off by making the voltage LOW
  delay(100);                       // wait for a second
}


Get the WiFi MAC address of ESP32 Module/available WiFi network

This example show how to get the WiFi MAC address of ESP32 Module, using Arduino core for ESP32. In this example, I just want to know the MAC address only, without connect to any hotspot, so no ssid and password needed (or it will connect to last ssid).


ESP32_WiFi.ino
/*
 * ESP-32 Example, 
 * start WiFi (without ssid and password)
 * and print the MAC address to Serial.
 * http://arduino-er.blogspot.com/
 */

#include <WiFi.h>

byte mac[6];

void setup()
{
    Serial.begin(115200);
    delay(1000);

    Serial.println();
    Serial.print("Program Start...");

    WiFi.begin();
    Serial.println("WiFi began");
    WiFi.macAddress(mac);
    
    Serial.print("MAC: ");
    Serial.print(mac[0],HEX);
    Serial.print(":");
    Serial.print(mac[1],HEX);
    Serial.print(":");
    Serial.print(mac[2],HEX);
    Serial.print(":");
    Serial.print(mac[3],HEX);
    Serial.print(":");
    Serial.print(mac[4],HEX);
    Serial.print(":");
    Serial.println(mac[5],HEX);

}

void loop(){

}

It match with the scanned address of the wireless router.


Remark:
May be it's something wrong on my ESP32 board; sometimes the program halt on the code WiFi.begin() without return. Try to close Serial Monitor, disconnect and reconnect ESP32 USB cable, then run Serial Monitor.


added@2022-03-12

Get MAC address of available WiFi network

It's a WiFiScan example installed with arduino-esp32. It act as WIFI_STA, scan available WiFi network and print the SSID, RSSI...


To get the mac address, call BSSID(), return uint8_t *. Or call BSSIDstr(), return String. Basically, BSSID is its MAC address.


/*
 *  This sketch demonstrates how to scan WiFi networks.
 *  The API is almost the same as with the WiFi Shield library,
 *  the most obvious difference being the different file you need to include:
 */
#include "WiFi.h"

void setup()
{
    Serial.begin(115200);

    // Set WiFi to station mode and disconnect from an AP if it was previously connected
    WiFi.mode(WIFI_STA);
    WiFi.disconnect();
    delay(100);

    Serial.println("Setup done");
}

void loop()
{
    Serial.println("scan start");

    // WiFi.scanNetworks will return the number of networks found
    int n = WiFi.scanNetworks();
    Serial.println("scan done");
    if (n == 0) {
        Serial.println("no networks found");
    } else {
        Serial.print(n);
        Serial.println(" networks found");
        for (int i = 0; i < n; ++i) {
            // Print SSID and RSSI for each network found
            Serial.print(i + 1);
            Serial.print(": ");
            Serial.print(WiFi.SSID(i));
            Serial.print(" (");
            Serial.print(WiFi.RSSI(i));
            Serial.print(")");
            Serial.println((WiFi.encryptionType(i) == WIFI_AUTH_OPEN)?" ":"*");

            //get MAC address
            uint8_t * nBSSID = WiFi.BSSID(i);
            Serial.println(WiFi.BSSIDstr(i)); //BSSIDstr() return in String
            
            delay(10);
        }
    }
    Serial.println("");

    // Wait a bit before scanning again
    delay(5000);
}


Tuesday, April 18, 2017

Introducing the Arduino MKRFOX1200

The MKRFOX1200 is a powerful board that combines the functionality of the Zero and Sigfox connectivity. It is the ideal solution for Makers looking to design IoT projects with minimal previous experience in networking.

ESP-32S Wifi Bluetooth Module

It is a Wifi Bluetooth Combo Module with ESP32-D0WDQ6 chip, named Goouuu-ESP32.


Compare with NodeMCU with ESP8266 WiFI module.


ESP32 is a low-cost, low-power system on a chip (SoC) series with Wi-Fi & dual-mode Bluetooth capabilities! The ESP32 series of chips presently includes ESP32-D0WDQ6 (and ESP32-D0WD), ESP32-D2WD, and ESP32-S0WD. At its heart, there's a dual-core (or single-core) Tensilica Xtensa LX6 microprocessor with a clock rate of up to 240 MHz. ESP32 is highly integrated with built-in antenna switches, RF balun, power amplifier, low-noise receive amplifier, filters, and power management modules. Engineered for mobile devices, wearable electronics, and IoT applications, ESP32 achieves ultra-low power consumption through power saving features including fine resolution clock gating, multiple power modes, and dynamic power scaling. ~ know more: http://esp32.net/


Useful links:
Arduino core for the ESP32
- Espressif Documents, EN/CN.

Related:
Install Arduino core for ESP32 to Arduino IDE, on Windows 10, and example list


Tuesday, April 11, 2017

First try Arduino Web Editor/Arduino 101 with Gyro example

My first try Arduino Web Editor/Arduino 101 with Gyro example. Assume Arduino plug-ins was installed correctly, and Arduino 101 is connect to PC.


The Arduino Web Editor allows you to write code and upload sketches to any official Arduino and Genuino board from your web browser (Chrome, Firefox, Safari and Edge) after installing a plugin (repository available here).


~ Getting Started with the Arduino Web Editor

Friday, April 7, 2017

Monday, April 3, 2017

Program the Siemens IOT2000 With Arduino IDE

The new Internet of Things gateway from Siemens (Simatic) has been released! It's based on the Intel Galileo Gen2 chipset.

This tutorial show how to "Program the New IOT2000 From Siemens With Arduino IDE!".